Tabla de contenidos
Puede instalar la misma impresora más de una vez en Windows, y cada una tiene su propia configuración. Por ejemplo, podría tener un dispositivo de impresión que imprima en color y otro que imprima en blanco y negro.
Este truco ha existido durante mucho tiempo. Windows XP lo hizo fácil, permitiéndole copiar y pegar dispositivos de impresora para crear nuevos. Se necesita un poco más de trabajo para instalar las impresoras secundarias en Windows 10 y Windows 7, pero aún es posible.
Encuentre el puerto y el controlador de su impresora
Para instalar manualmente la impresora por segunda vez, debe conocer el puerto y el controlador que utiliza la impresora.
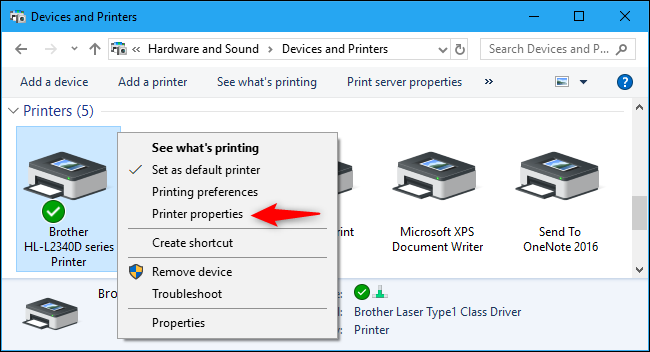
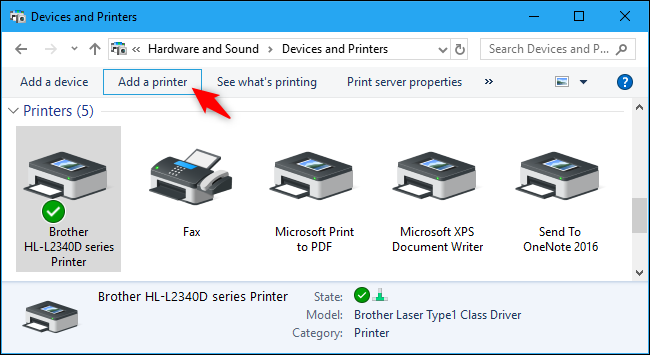
Para encontrar esta información, diríjase a Panel de control> Hardware y sonido> Dispositivos e impresoras. Busque la impresora de la que desea hacer una copia, haga clic con el botón derecho del ratón y seleccione «Propiedades de la impresora».
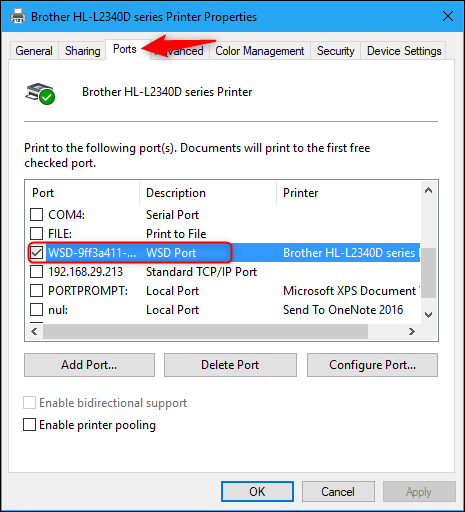
Haga clic en la pestaña «Puertos» y observe qué puerto de impresora está seleccionado. Esto le indica qué puerto seleccionar al agregar la impresora.
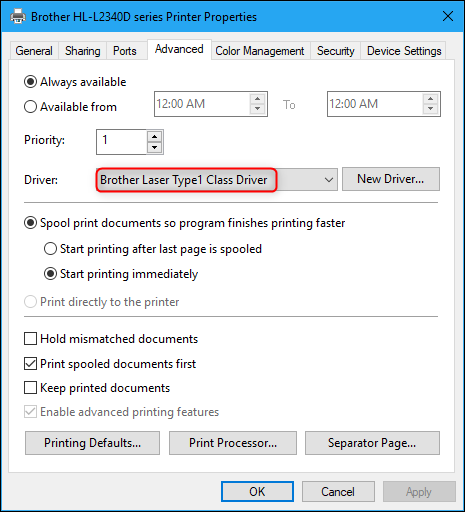
Haga clic en la pestaña «Avanzado» y observe el nombre a la derecha de «Controlador». Esto le indica qué controlador seleccionar al agregar la impresora.
Puede cerrar la ventana de propiedades de la impresora haciendo clic en «Cancelar».
Instale una copia de la impresora
Ahora tiene toda la información que necesita para instalar la impresora por segunda vez. Esto crea un nuevo dispositivo virtual en Windows, uno que apunta a la misma impresora física pero tiene sus propias preferencias de impresión.
Para comenzar, simplemente haga clic en el botón «Agregar una impresora» en la barra de herramientas en la ventana Dispositivos e impresoras.
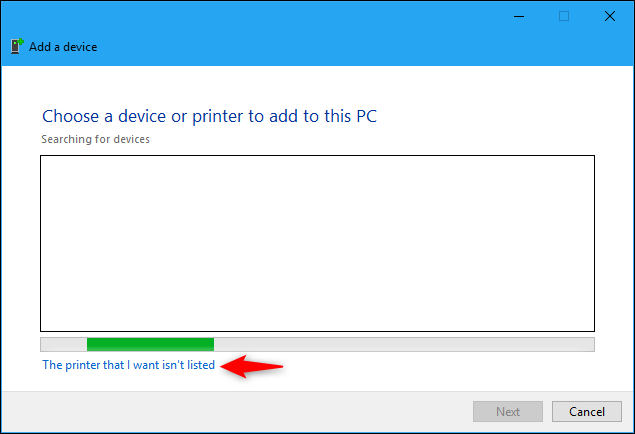
Haga clic en «La impresora que quiero no aparece en la lista» para agregar manualmente una impresora.
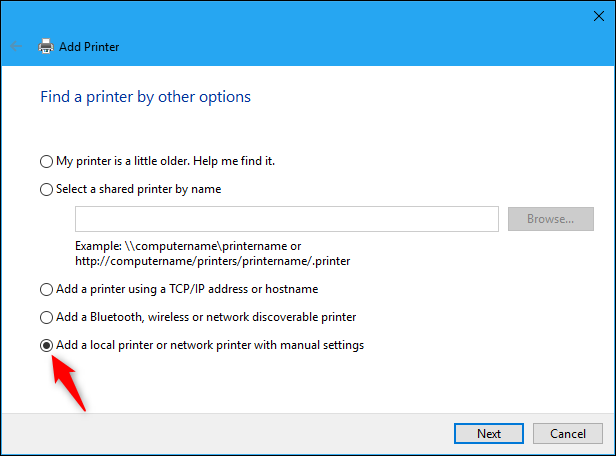
Seleccione «Agregar una impresora local o una impresora de red con configuración manual» y haga clic en «Siguiente».
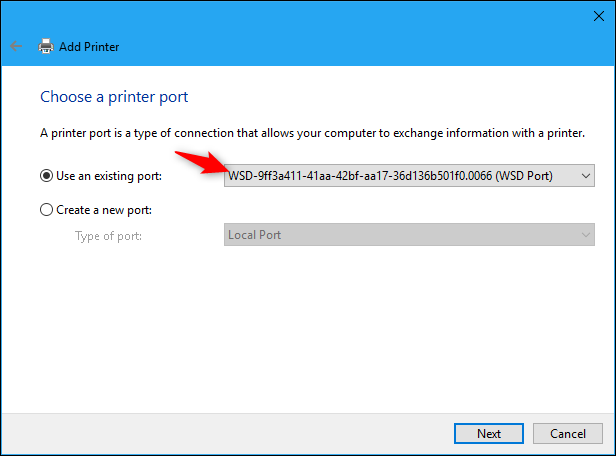
Seleccione «Usar un puerto existente». En el cuadro desplegable, seleccione el puerto que está usando su impresora (como se muestra en la pestaña Puertos en la ventana de propiedades de la impresora) y haga clic en «Siguiente».
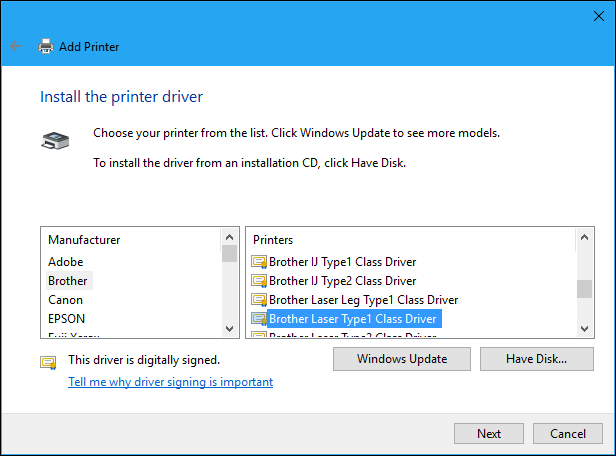
Seleccione el controlador que su impresora ya está usando, como se muestra en la ventana de propiedades de la impresora, y haga clic en «Siguiente».
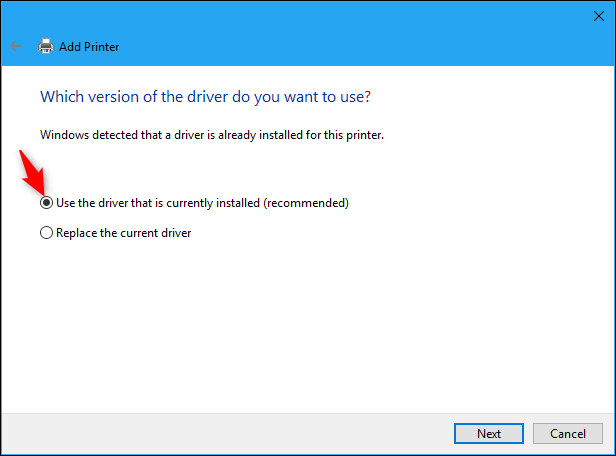
Seleccione «Usar el controlador que está instalado actualmente (recomendado)» y haga clic en «Siguiente». Esto asegura que el nuevo dispositivo de impresora esté usando el mismo puerto y controlador de impresora que el dispositivo de impresora original.
Ingrese un nombre para la impresora y haga clic en «Siguiente» para continuar. Puede asignarle el nombre que desee, así que elija un nombre que le ayude a recordar qué impresora física y qué configuración de impresión utilizará.
También puede cambiar el nombre de la impresora más tarde.

Finally, choose whether to set up printer sharing or not and click “Next.”

You can click “Print a test page” to test the printer, if you like. Click “Finish” when you’re done.
How to Use Your Second Printer
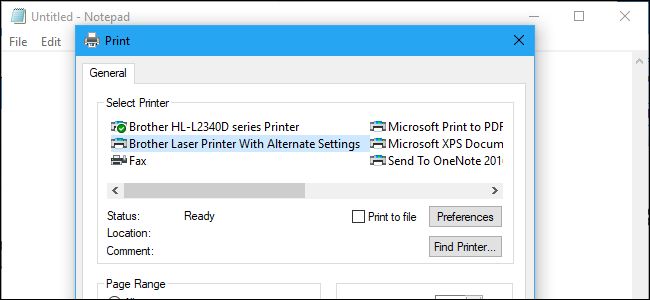
Your new printer device will appear as an option in standard print dialogs. You can select the printer and click the “Preferences” button or right-click it and select “Printing Preferences” to assign different preferences to each device, and Windows will remember the settings separately.
You can also right-click a printer and click “Rename” to rename each printer, giving them names that correspond to your saved settings.
For example, you might set one printer device to print in color at high-detail settings and one printer to print in black and white with low detail settings. Each will print to the same physical printer, but you won’t have to spend time changing your settings back and forth every time you want to print—just select the appropriate printer in the list.
There’s nothing stopping you from creating more than two printers, too. You can install the same printer as many times as you like, assigning different profiles of preferences to each one.
How to Manage Additional Printers
While the additional printers you add will show up as options in the Print dialog, they don’t appear normally in the Devices and Printers window, or in the new Settings > Devices > Printers and Scanners interface on Windows 10. Windows automatically combines them together in these printer management interfaces, which is a little inconvenient.
You can still see the alternate printers from the normal printer configuration window, if you like. For example, to see the secondary printer in the Devices and Settings window, right-click the physical printer and you’ll see options for each installed printer device.
In the Windows 10 Settings interface, click the “Manage” button for a printer and you’ll be able to switch between the printer profiles you’ve installed to change settings for each.
You can manage these devices a bit more easily by pressing Windows + R to open the Run dialog, copy-pasting the following line into it, and pressing Enter:
shell:::{26EE0668-A00A-44D7-9371-BEB064C98683}\0\::{2227A280-3AEA-1069-A2DE-08002B30309D}
This opens the old Printer management window, which shows every printer device you’ve installed separately. From here, you can rename them, delete them, change their preferences, or add more printers and they’ll all appear as separate devices.
For example, you can quickly right-click one of the printers here and select “Delete” to remove the second printer profile from your system.
Of course, you can also do much of this from the Print dialog that appears when you try printing documents, so you don’t even need to use any of these settings interfaces after installing the printer.
If you find you don’t need the secondary printer and it’s cluttering up your list of installed printers, just head to that hidden Printers window via the secret command, right-click the secondary printer you installed, and click “Delete” to remove it from your system.